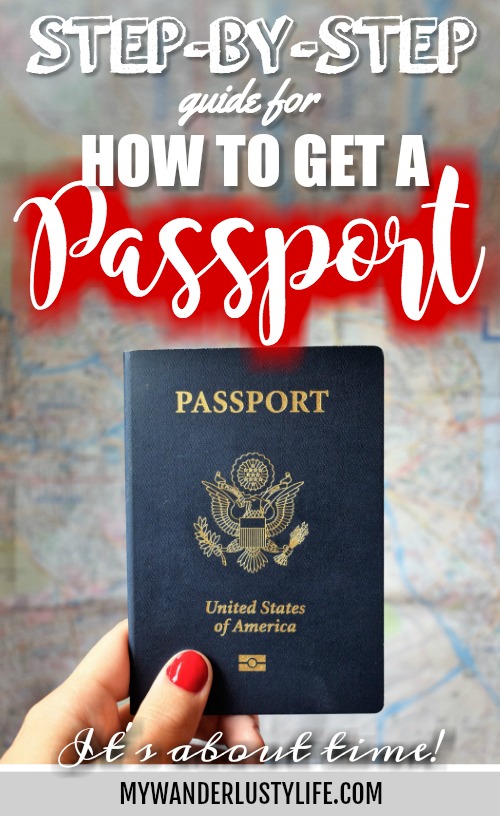
When it comes to how to get a passport, if you couldn’t tell by the title of this post, it’s my firm belief that everyone should have gotten a passport like yesterday.
Even if you don’t have any trips planned, you should have one. What if the opportunity to leave the country (or worse, necessity! Hello, alien invasion.) pops up and you lack the mandatory documents to skeedaddle?
Not all international trips come with a 6-month notice, you know. Just be prepared to drive all your friends and loved ones to the airport and wave goodbye from the highway, s’all I’m sayin’.
Why you should get a passport
At time of publication, the United States passport is currently the 5th strongest passport in the world. It’s the Jean-François Caron of passports, if you will. (JFC is currently the 5th strongest man in the world—a lunatic who deadlifts over 1,000 pounds. That’s a grizzly bear, you guys. The guy can lift a grizzly bear.)
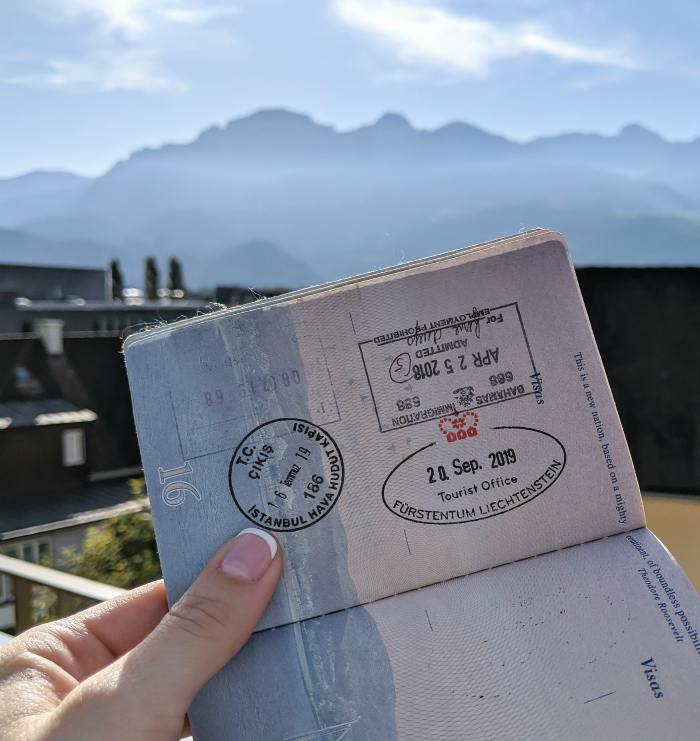
This means that little blue book with the worst picture of you ever has the power to get you into 186 countries, no questions asked (well, except for the few they ask you at customs but you know what I mean).
To possess a U.S. passport is to possess a power only 137 million other Americans have. The power to travel around the world freely, the power to get up and go at a moment’s notice, and the power to always have a backup ID when you lose your driver’s license at a bar, ya lush.
So if you’re in the sad majority of Americans who don’t currently hold a passport (and you are because you’re reading this post), let’s get you one! Below is my step-by-step guide to figuring out the mildly confusing process of how to get a passport.

How to get a passport
I feel for legal reasons I should probably say: I do not work for the federal government—so don’t sue me if anything in this post doesn’t hold up.
I am, however, someone who has gone through this process a number of times and who has explained this process, in excruciating detail, to a number of friends and family members. There were color-coded tabs and highlighters involved–I’m pretty sure *that* establishes my authority.
If you’d still rather get your information straight from the source, here’s the official U.S. Department of State passport-getting website. But know it’s way less funny and far more confusing.
Things to know regarding how to get a passport
So you’re looking to become a stamp collector, eh? Figuring out how to get a passport can seem overwhelming if you’re on the outside looking in. Not for Jean-François Caron however—he eats passports for breakfast. Here are a few things to know about acquiring a passport before we get started:
- Passports are good for ten years – can your car/job/boyfriend say that? That means you’ll be in a whole ‘nother demographic before you’ll need to renew.
- Passports are not free. But really, is anything?
- You’ll need a printer, a copy machine, and a stapler. Or at least a husband with an office that has them.
- The passport acquisition process is a long one… but there are ways to shorten it, which I’ll get to.
- You’re going to have to get off your bum and interact with another human being. Cumbersome, I know, but you’re about to be given tons of power, remember?
- If you need an emergency passport, there’s a solution for that too, which I’ll get to. But don’t let it get to that point! Get a passport now!

How to get a passport, step 1: Get your picture taken
I always list getting your photo taken as How to Get a Passport Step #1 because:
- Getting off your butt is often the hardest part, so just go ahead and get that outta the way. It’s all downhill paperwork from here.
- This way, after you’ve gotten your paperwork all together, you don’t have to wait to add your photo to it—since you already have it.
Otherwise, you and I both know what’s going to happen. Completed paperwork sits in a desk pile waiting for your photo to be stapled to it. The trip to get your photo taken breaks down in procrastination station. More pressing matters and Victoria’s Secret catalogs end up on top of passport paperwork. The aliens invade and your ass is grass. You can’t Arrival your way out of this one.
I say *always* because I have 100% put the contents of this blog post together in a manila folder and mailed it off to friends in desperate need of a passport. I’m the best friend you’ll ever have.
Where to get your passport photo taken
If you’re a member of the “Eww no, let’s take it again” club, let it be known that you are allowed to take your own passport photo. But like, who has time for that? Who, also, has an off-white photo backdrop, proper photography lighting, and a photo quality printer at home? If you do, you’re probably making tons of money selling your shoes on Ebay, am I right?
You might like
─
Heading out on your first international trip? I highly recommend picking up a guidebook or two. Especially Culture Smart guidebooks to learn about the culture and local customs of the country you’re visiting! Check out my Culture Smart guidebook review here.
For the rest of us, there’s the drug store. Walgreens or CVS, depending on what part of the country you live in. Or even Rite-Aid if where you live is the 1970s.
Getting your passport photo taken at Walgreens or CVS is a quick, five-minute process and will cost you $14.99—you’re paying for the convenience, okay?
These stores have all the equipment, know how to get a passport photo according to the long list of conditions, and will print the photos right there while you wait. They will even retake your photo if it is, indeed, and “Eww no!” situation.
Find locations here for Walgreens and CVS photo services.

There are cheaper, less convenient options—but maybe they’re actually more convenient, I don’t know where you live.
You can also get your passport photo taken at:
- Fedex Office – $14.95, find locations here.
- Costco – $4.99, by far the cheapest but you need to be a Costco member ($60/year) and this service is only offered at some locations. Find locations here.
- AAA – $8 for members and $15 for non-members. Free if you’re AAA Plus- or Premier-level. Find locations here.
- U.S. Post Office – $15 and this service is only offered at some locations. But if you’re the kind of person who is at the post office fairly often and who doesn’t look like you’ve just fallen off the back of the exhausted truck, by all means, get it done while you’re picking up stamps. Find locations here.
- Walmart – $7.44, (Walmart, you exhaust me with your pricing model.) but I doubt either of the examples on their site would pass the Department of State photo test, so… it’s probably worth a little more to ensure your paperwork doesn’t get returned to you. I mean, it’s Walmart. They can’t even do prices well. Seven dollars and forty-four cents, what is that? Find locations here and good luck.

The long list of passport photo dos and don’ts
The most important thing to remember when considering how to get a passport: you’re applying for official documents from the federal government. And the federal government wants you to look as terrible as possible. Which is how I look when I’m flying international anyway, so I guess it makes sense.
Getting your passport photo taken is fairly straightforward but there is a list of strict criteria to take into consideration.
How to get a passport photo taken in one go-around:
- No smiling. This is actually, physically challenging. (Especially for those of us who have never been arrested.)
- No glasses – on your face or on your head
- No hats or headwear of any kind – obviously there are certain exceptions to this rule.
- Photo must be taken within the 6 months leading up to the submission of your passport application
- Your eyes must be open.
- You must be wearing normal street attire.
- No headphones or Bluetooth devices

For those of you who wish to take your own passport photos at home, there’s a special list for you too:
- The photo must be in color
- It must be a picture of you and you alone. You and your husband may share a Facebook page but you can’t share a passport photo. It’ll be okay—you can do this.
- The photo must be 2×2 inches, with your face being between 1 and 1 3/8 inches from chin to dome.
- Solid white or off-white background
- Must be printed on photo-quality paper
- No retouching! Sorry to say but those zits are going with you to France, mon ami.
- No selfies
- No photobooth photos (what the federal government refers to as ‘photo vending machines’)
- The photo must be taken straight on. Not from above, and certainly not from below—we don’t want to have to issue a passport to each of our chins.
- Seriously though, just go to Walgreens.
Important note before we continue: you will hate your passport photo. This is the moment you realize trying to take a non-smiling photo without looking like a Florida mug shot is just not as easy as Chrissy Teigen at the Golden Globes makes it look.
Then, before printing it in the most important document you’ll own, the feds will screw with the saturation so much it’ll either look like you just came back from your last international trip (to the sun), or give you under eye bags large enough to pack a week’s worth of clothes into.

How to get a passport, step 2: Fill out the paperwork
Since this post is all about how to get a passport, for the first time, I’m going to simply focus on that process. If you need instructions on renewing a passport, click here; for name changes, click here.
First, you’ll want to make sure you have the right form. For someone applying for his/her first ever passport (that’s you!), you’ll want to complete form DS-11.
This form is six pages long, but only two need to be filled out. The other four are basically this blog post translated into legal jargon.
On filling out the DS-11 form:
- You can either fill it out online and then print.
- Or print it out blank and write your answers in using black ink
- At the top of the application in the white box, you want to check “U.S. Passport Book” – that’s the blue book that gets the pretty stamps. I have no idea what a “passport card” is but it won’t get you across any borders so byeeeeee
- Yes, the passport application needs your parents’ names and information – even if you’re a grown up. And people think the government knows too much about us already, pshh.
- Staple one of your mug shots to the form where it says “staple” – think you got that?
Now, whatever you do, do not sign that application. Instead, you’ll sign it in front of the federal employee processing your application. Even James Bond had to do this. Probably.

How to get a passport, step 3: Collect your supporting documents
Here’s where you’re required to prove both your identity and your U.S. citizenship. James Bond did not have to do any of this actually, because he’s British. I just realized that. He probably still has an American passport though because he is James Bond after all, but I digress.
Along with your completed, unsigned DS-11 form, you’ll need to also bring:
Proof of identity
This can be: your driver’s license or permit, state-issued non-driver ID, certificate of naturalization, certificate of citizenship, military ID, federal/state/municipal government employee ID, Green Card, or a Trusted Traveler ID such as a valid Global Entry card which I have and that actually has a great picture on it! Thank God for black and white photos, s’all I’m sayin’.
Whatever you bring, make sure the picture pretty much looks like you.
If you’re applying for a passport in a state other than the one that issued your driver’s license, you’ll need to bring something else. Or like, go to that state to finish the process. But judging by how hard it was to get you to Walgreens, I’mma say just come up with a plan C.
Proof of U.S. citizenship
This can be: your birth certificate—like yes, your actual birth certificate. Oh, you don’t know where it is? Don’t worry; your mom totally has it stored away in a fireproof safe in the back of her closet in your childhood home.
You can also bring a certified copy of your birth certificate which means a copy made of your birth certificate by the people who issued it in the first place (so, I’m guessing they mean the hospital?). It’ll have a fancy seal or stamp on it.
You can also prove your U.S. citizenship by providing your Certificate of Naturalization or your Certificate of Citizenship, because of course you can. That’s the whole point.
For those of you born outside the U.S. or whose mother’s can’t for the life of them remember what they did with your birth certificate, the situation gets a little hairy.
If that’s the case, see page 2 of the DS-11 form where it lists other forms of citizenship proof, among them a “circumcision certificate” – so that’s something you didn’t know until just now!
Photocopies of both
In addition to the proofs of identity and citizenship, you’ll also need to provide a photocopy of each. These must be black and white, totally legible copies of both the front and back of the documents, on single-sided 8.5 x 11-inch paper.
You’ll show the original documents to the agent accepting your passport application, and the photocopies they will keep for their own records and probably not use to open their own small businesses. I’d like to see them try actually—ain’t nobody loaning me a casual $500k.

How to get a passport, step 4: Get your money together
Whoever said the best things in life are free, obviously never applied for a passport. He or she was clearly content staying put here in America eating super-sized burgers and fries, lounging around in yoga pants watching The Bachelor, and shouting “Git-r-done!” at passersby on their John Deeres. For the ambitious rest of us, we gotsta fork up the cash.
For adult, first-time passport applicants, there’s a $110 application fee (which goes to the State Department for the actual passport) + a $35 execution fee which sounds like a payment made to a hitman but is actually what goes to the post office for checking your documents and submitting the application for you. (Just maybe don’t write “execution fee” in the note section on your check?)
The two fees are paid separately. The post office accepts checks, debit cards, and credit cards while the State Department accepts checks made payable to: Ashley Smith, c/o My Wanderlusty Life, P.O. Box …. I kid, I kid! (If you’re not an adult, first-time passport applicant, click here to see what your fees are.)

Passport expedition
So you don’t want to (or literally can’t) wait the standard 4-6 weeks for your passport to arrive in the mail, eh? Well, there’s an app for that. And by app I’m specifically referencing whichever online banking app you currently use.
It’s true—sometimes when you want something done a little quicker you can simply throw money at the problem. This is one of those times.
Opting for passport expedition shortens that wait time to, officially, 2-3 weeks, but I’ve received mine even faster than that. I’ve always opted for this because 1) I’m super impatient, and 2) because I just feel like the less time all my valuable, personal information is floating around out there in postal limbo, the better.
To expedite your passport application, be sure to explicitly request it when submitting your application at the post office.
The fee for passport expedition is an extra $60 (payable to the U.S. Department of State) on top of the $110 application fee.
Want even more expedier expedition?
Opt for 1-2 day delivery, both ways. How much it costs to next-day your application to the State Department will depend on your location, but you can go ahead an add another $15.89 “1-2 Day Delivery” service fee to your passport fee (payable to the U.S. Department of State) for speedier shipping when they send it back to you. So…
- Standard passport processing: $110 + $35, 4-6 weeks
- Expedited passport processing: $110 + $60 + $35, 2-3 weeks
- Wicked expedited, expedited passport processing: $110 + $60 +$15.89 + $35, 2-3 weeks officially still, but like, on the lowest possible end of that.

How to get a passport, step 5: Submit application in person
If you’re a first-time passport applicant (hey, you), you must submit your application + documents in person to a “designated acceptance agent” who’s, like, really good as spotting phony circumcision certificates.
A designated acceptance agent can be any number of things—if you want the full list, click here—but all you really need to know is your local post office.
Well, probably. Not every U.S. Post Office (which I just learned is a trademarked phrase) accepts passport applications but most do.
Some accept walk-in applications while others require appointments. Type your zip code into this page to find the Post OfficesTM that are nearest to you, their hours, their parking situation, and whether you can walk-in or if you need to schedule an appointment. Which you can do right on on that page. Right from your couch. Giggity.

How to get a passport in an emergency
So you waited until the last minute to get a passport, huh? So you didn’t know you needed a passport to drive to Canada, eh? Oh, so you didn’t know that to travel to certain places you’re required to have a full blank passport page?
So you didn’t know that to travel to Europe, your passport has to be valid for at least six months from the date of your return? (Don’t. even. ask. I don’t get it either.) Well, you’re in luck! There’s an app for that! And by app I mean a slightly frustrating and nerve-wracking process.
To get a passport in the event of a life or death emergency, go here to the Life-or-Death Emergencies passport page. Also, my apologies for making you sit through 3000+ words to figure that out.
To get a passport for a trip that’s less than 2 weeks away, you can apply in person at a Department of State passport agency by appointment. And no, there’s not one in your neighborhood. There might not even be one in your state. Fun, huh?
Here’s the list of where you can find them. You’ll need an appointment, which you can make online here.

To get a passport tomorrow
You better get yourself to bed because you’re going to be waking up hella early. Now, I have not personally had to acquire a passport this way (“Hi. My name is Ashley. And I’m a Type-A personality.”), but both my husband and a good friend have both had to go through this process. And both did so at the Miami passport agency, for whatever that’s worth.
First things first, when it comes down to this, check your nearest passport agency online and see if there are any next-day appointments available. If there aren’t (because, duh, Murphy’s Law and because, duh, federal government), drastic measures are required.
In lieu of an appointment, you can show up to the passport agency, wait in line, and pray for an opening. Find out what time the passport agency opens and show up before that. An hour before that if you have to. Bring a book maybe? Some crossword puzzles? But not your laptop—they frown on that.
Here’s what to bring with you:
Bring all of your completed paperwork and passport photos with you. Have everything prepared as if you were showing up to your local Post OfficeTM with plenty of time to spare.
Bring your checkbook if for no other reason than you don’t get to bring that sucker anywhere anymore. The price for a same-day passport is the same as an expedited passport. Unless they’ve changed that—they should totally charge more for this. Let’s work on that national debt, guys.
Bring proof of your imminent travel. You can’t just walk in and get a passport cuz you impatient. Bring something that shows you’re about to leave the country (), like your flight itinerary.
It may take a while to get in, but it will take even longer for them to make your actual passport. You can stay at the agency and wait for it, or leave and come back (they’ll give you a time window when your passport will be ready).
Don’t let it come to this! Get your passport now, if just for the sake of having one!

Got that passport? Here’s what else you need
So you’ve applied for your passport! Good, good. But the fun doesn’t end there! You don’t just buy a new dress and not accessorize. So let’s accessorize your global travel with:
TSA Pre✔️
I denied needing TSA Pre✔️ for years (I’m quite cheap), but now that I have it I can attest to the fact that it’s 100% necessary.
The first time I ever used it I skipped a line of approximately 600 people in the Boston airport. Six. Hundred. People. I just pranced right past every single one of them half smug and half thinking I was absolutely headed for TSA jail.
Add in the fact that you get to keep your shoes on and your laptop/liquids/camera in your bag and TSA Pre✔️ proves worth every penny.
To get TSA Pre✔️, you’ll need to apply online, attend a 10-minute in-person interview, submit to a background check, provide fingerprints, and pay the fee–$85 for a 5-year membership. Keeping your clothes on at security screening? Priceless.
Global Entry
Global Entry is kinda the reverse of TSA Pre✔️. It lets you skip the customs line and gets you back into the U.S. in mere seconds.
Besides that, a Global Entry membership includes TSA Pre✔️, makes you a “known traveler” which is basically the opposite of the no-fly list, and you even get a cute Global Entry membership card which you can use to prove your identity to federal agents and to prove to airline employees that you can, in fact, take a decent photo that you’re actually allowed to smile in.
To become a Global Entry member, you’ll need to create an online account, pay the application fee–$100 for a 5-year membership, wait to be approved, attend an in-person interview with your fancy new passport, and give up your fingerprints.

TSA Mobile Passport App
The TSA Mobile Passport app is officially authorized by U.S. Customs and Border Protection and is another alternative to help you skip all the lines at customs–currently at 27 U.S. airports. Oh, and it’s free! Before I had Global Entry, this was my trusty go-to.
Basically, you fill out all the customs info on the app (instead of the sheets of paper they hand out on the plane, and instead of the computer kiosks in the terminal), take your own picture, then follow the signs that say “Mobile Passport”.
The app has its own dedicated customs line where you scan your phone and get on with your day. No questions, no long lines, no having to listen to the lady in front of you complaining about how long the lines are and all her half-witted solutions to fix it.
Priority Pass
I am officially spoiled. I will never go back to everyday airport life again. A Priority Pass membership gives you access into 1200+ fancy airport lounges all over the world.
I’m talking free meals and drinks, open bars, tiny bottled waters, snacks, showers, clean bathrooms with no lines, entertainment, wifi and charging outlets, and places to sleep. All for free. And you can bring guests. The last one I was in had a Playstation room.
I know I sound like an advertisement but Priority Pass has been simply life changing for me. And that is not hyperbole.
To become a Priority Pass member, you’ll need to create an account online and pay the annual $429 fee. That’s wicked steep, I know, but 1) it’s absolutely worth it now that you’re going to be jetsetting on the regular, 2) they do offer different (lower-priced) levels for those who travel more seldom, 3) there’s often a discount so be sure to check the link, and 4) or you can just get a…

A good travel credit card
You know how all my friends sold me on the Chase Sapphire Reserve credit card? They took me to the airport lounge in Mexico City. I applied as soon as I woke up the next morning, still drunk off free tortilla chips and coconut water.
You see, when you hold a Chase Sapphire Reserve card, you get TSA Pre✔️, Global Entry, and a Priority Pass all for free.
You also get an annual $300 travel credit and like a bazillion points to use for free flights, hotels, etc. Not to mention, they also have the best customer service I’ve ever dealt with.
I thank my friends for introducing me to this card annoyingly often. I mean, I was pretty much ambushed into getting it – so they had it coming to them. And no, I promise I don’t work for Chase, I’m just really happy with the way my friends’ peer pressure turned out.
Travel insurance
Unfortunately, things can and do go wrong when you travel. Travel insurance can offer coverage for tons of activities as well as emergency medical, lost luggage, trip cancellation and more.

Time to show off!
So you’re about to get your first passport (yay!) and I know how thrilling that can be. That little blue book will be the single most important, life-changing, beneficial thing you’ll ever own.
You are now free to go almost anywhere in the whole entire world. Even Antarctica. Even the country of Timor-Leste—I don’t know where that is but let’s go anyway! So, you ready to celebrate your new life? To show off that you’re now a global citizen?
Check out these fun passport items:
- How about a cute passport cover? I particularly like the Airport Codes and World Citizen ones. And this perpetual reminder that your money is being well-spent. Maybe you’re a space tourism nerd–there’s an adorable passport cover for you too!
- U.S. Passport Pouch Bag | I actually really need this in my life.
- U.S. Passport Tote Bag
- I actually think this U.S. Passport blanket would make the best travel blanket ever.
- Click here for more unique U.S. passport-related items.
And these other miscellaneous travel-related items:
- Like these all-too-honest packing bags
- The Short Layover is My Cardio T-shirt (I mean, it is though.)
- and probably my favorite item of all, the Random Crap weekender bag. Let’s keep it real, travelers.
Enjoy your new passport! Bon voyage! ✈️
Where are you going on your first trip?
But first, PIN ME ⇣⇣⇣

